
How to create an invoice: a step-by-step guide

Learning how to create an invoice can help your business get paid on time.
In the UK, research indicates that around one in five self-employed workers are waiting over three months past the payment deadline.
These late payments can severely disrupt your cash flow, especially if you run a small business with a tight budget.
So, how can you ensure you get paid on time for the sale of your products or services? By sending accurate, professional invoices.
Creating an invoice properly helps you get paid on time, track your income and keep up-to-date financial records.
Further, by documenting the products and services provided along with their prices, invoices help you stay organised and get paid fairly.
In this article, we’ll introduce a step-by-step process so you can learn how to write an invoice that looks professional and includes all the right information. We’ll also cover some tips for ensuring you get paid on time and what to do if you don’t.
Table of contents
- Step 1: Start with a professional template
- Step 2: Add business details
- Step 3: Identify your invoice
- Step 4: List the delivered products or services
- Step 5: Specify the total amount due
- Step 6: Mention all the dates
- Step 7: State your payment terms
- Step 8: Add VAT details (if applicable)
- How to get paid on time and what to do if you don’t
- Create your professional invoice


Step 1: Start with a professional template
Creating invoices from scratch without the appropriate tools can be challenging. Though it may look like a simple document, forgetting just one key detail can lead to headaches down the line (something no business owner has time for).
To smooth your professional invoice creation process, it’s best to use an invoice template.
One major advantage of using a free invoice template is that you don’t have to worry about the design.
Business owners can spend a lot of time playing around with their invoices to make them look professional (e.g., adding and removing headers, table columns, images, etc.). Using a go-to template with everything in the right place every time will save you significant hours across your working year.
Use your template’s placeholders to ensure you don’t miss anything critical, such as the unique invoice number, purchase order number or payment terms.
Missing small elements, like your unique invoice number, can stall operations and even lead to issues when it comes time to file your tax return. Automating your invoice processes can help keep things organised and mitigate data entry problems so you avoid needless penalties.
There are plenty of resources available to help you find the right invoice template for your business. For instance, you can browse through the built-in invoice templates in Microsoft Word or Excel (Windows users) or Pages (Mac users) to get started.
You can also send 3 customisable invoices for free every month by connecting your business bank account to the Tide platform. Bill your customers directly from the app using our free invoice templates.
Top Tip: If you’re brand new to running a business, you might need to start with the basics. Learn about the types of invoices and hear from top experts in our guide on what is an invoice 🤔
How to make an invoice look great
Brand your invoices to make them feel more professional and recognisable. Consistent branding across your channels and assets helps customers feel like they’re doing business with the right person and avoids unnecessary confusion.
To create a branded invoice, consider the following:
- Include your business logo in the header and/or footer of the invoice
- Add your business’s mission statement or a defining quote
- Include a thank-you message in your brand’s tone of voice
Top Tip: It’s important to be consistent with your branding across all of your assets. Invoices with logos that are drastically different to your email headers and website branding may cause confusion. To learn more about branding, read our 7-step guide to how to build a brand that customers love 🔥
Step 2: Add business details
Once you’ve chosen an invoice template, you can now add your information.
First, add the business details for both yourself and your client. This typically includes the following information:
- Your business name
- Your business address
- Your contact information (phone number and email)
- The client’s name and/or business name
- The client’s address and/or business address
- The client’s contact information
The business details you’re legally required to include depend on if you’re a sole trader or a limited company.
If you’re a sole trader, you’ll need to include your name and the address where you receive legal documents (this is sometimes an office address or virtual address but can also be your home address).
If you’re a limited company, you must include the full company name as it appears on the certificate of incorporation. Also, if you include the names of any directors on your invoices, you’ll need to include the names of all directors.
Make sure to double-check all the information, including your client’s specifics. If you add any incorrect details, such as a wrong address, it could lead to unnecessary delays in payment.
Step 3: Identify your invoice
The UK government requires business owners to add a unique identification number to their invoices, which is useful in several ways.
The unique identification number is one of the most important invoice details, also called the invoice number or invoice ID. It helps businesses and clients keep track of all their invoices, including those delayed or lost.
There’s no one specific way to mark your invoices; some businesses prefer using an increasing number sequence, such as 00045, 00046, 00047 and so on. Others prefer incorporating letters into their invoice IDs, such as A0028, T1076 or P0075.
Invoice IDs with letters are especially helpful when distinguishing between clients or invoice types.
For example, invoice IDs beginning with the letter A could identify standard invoices, while invoice IDs beginning with the letter T could denote tax invoices.
Assigning a unique invoice ID can also help businesses calculate the total number of invoices they’ve sent out during a specific period, along with the average order value.
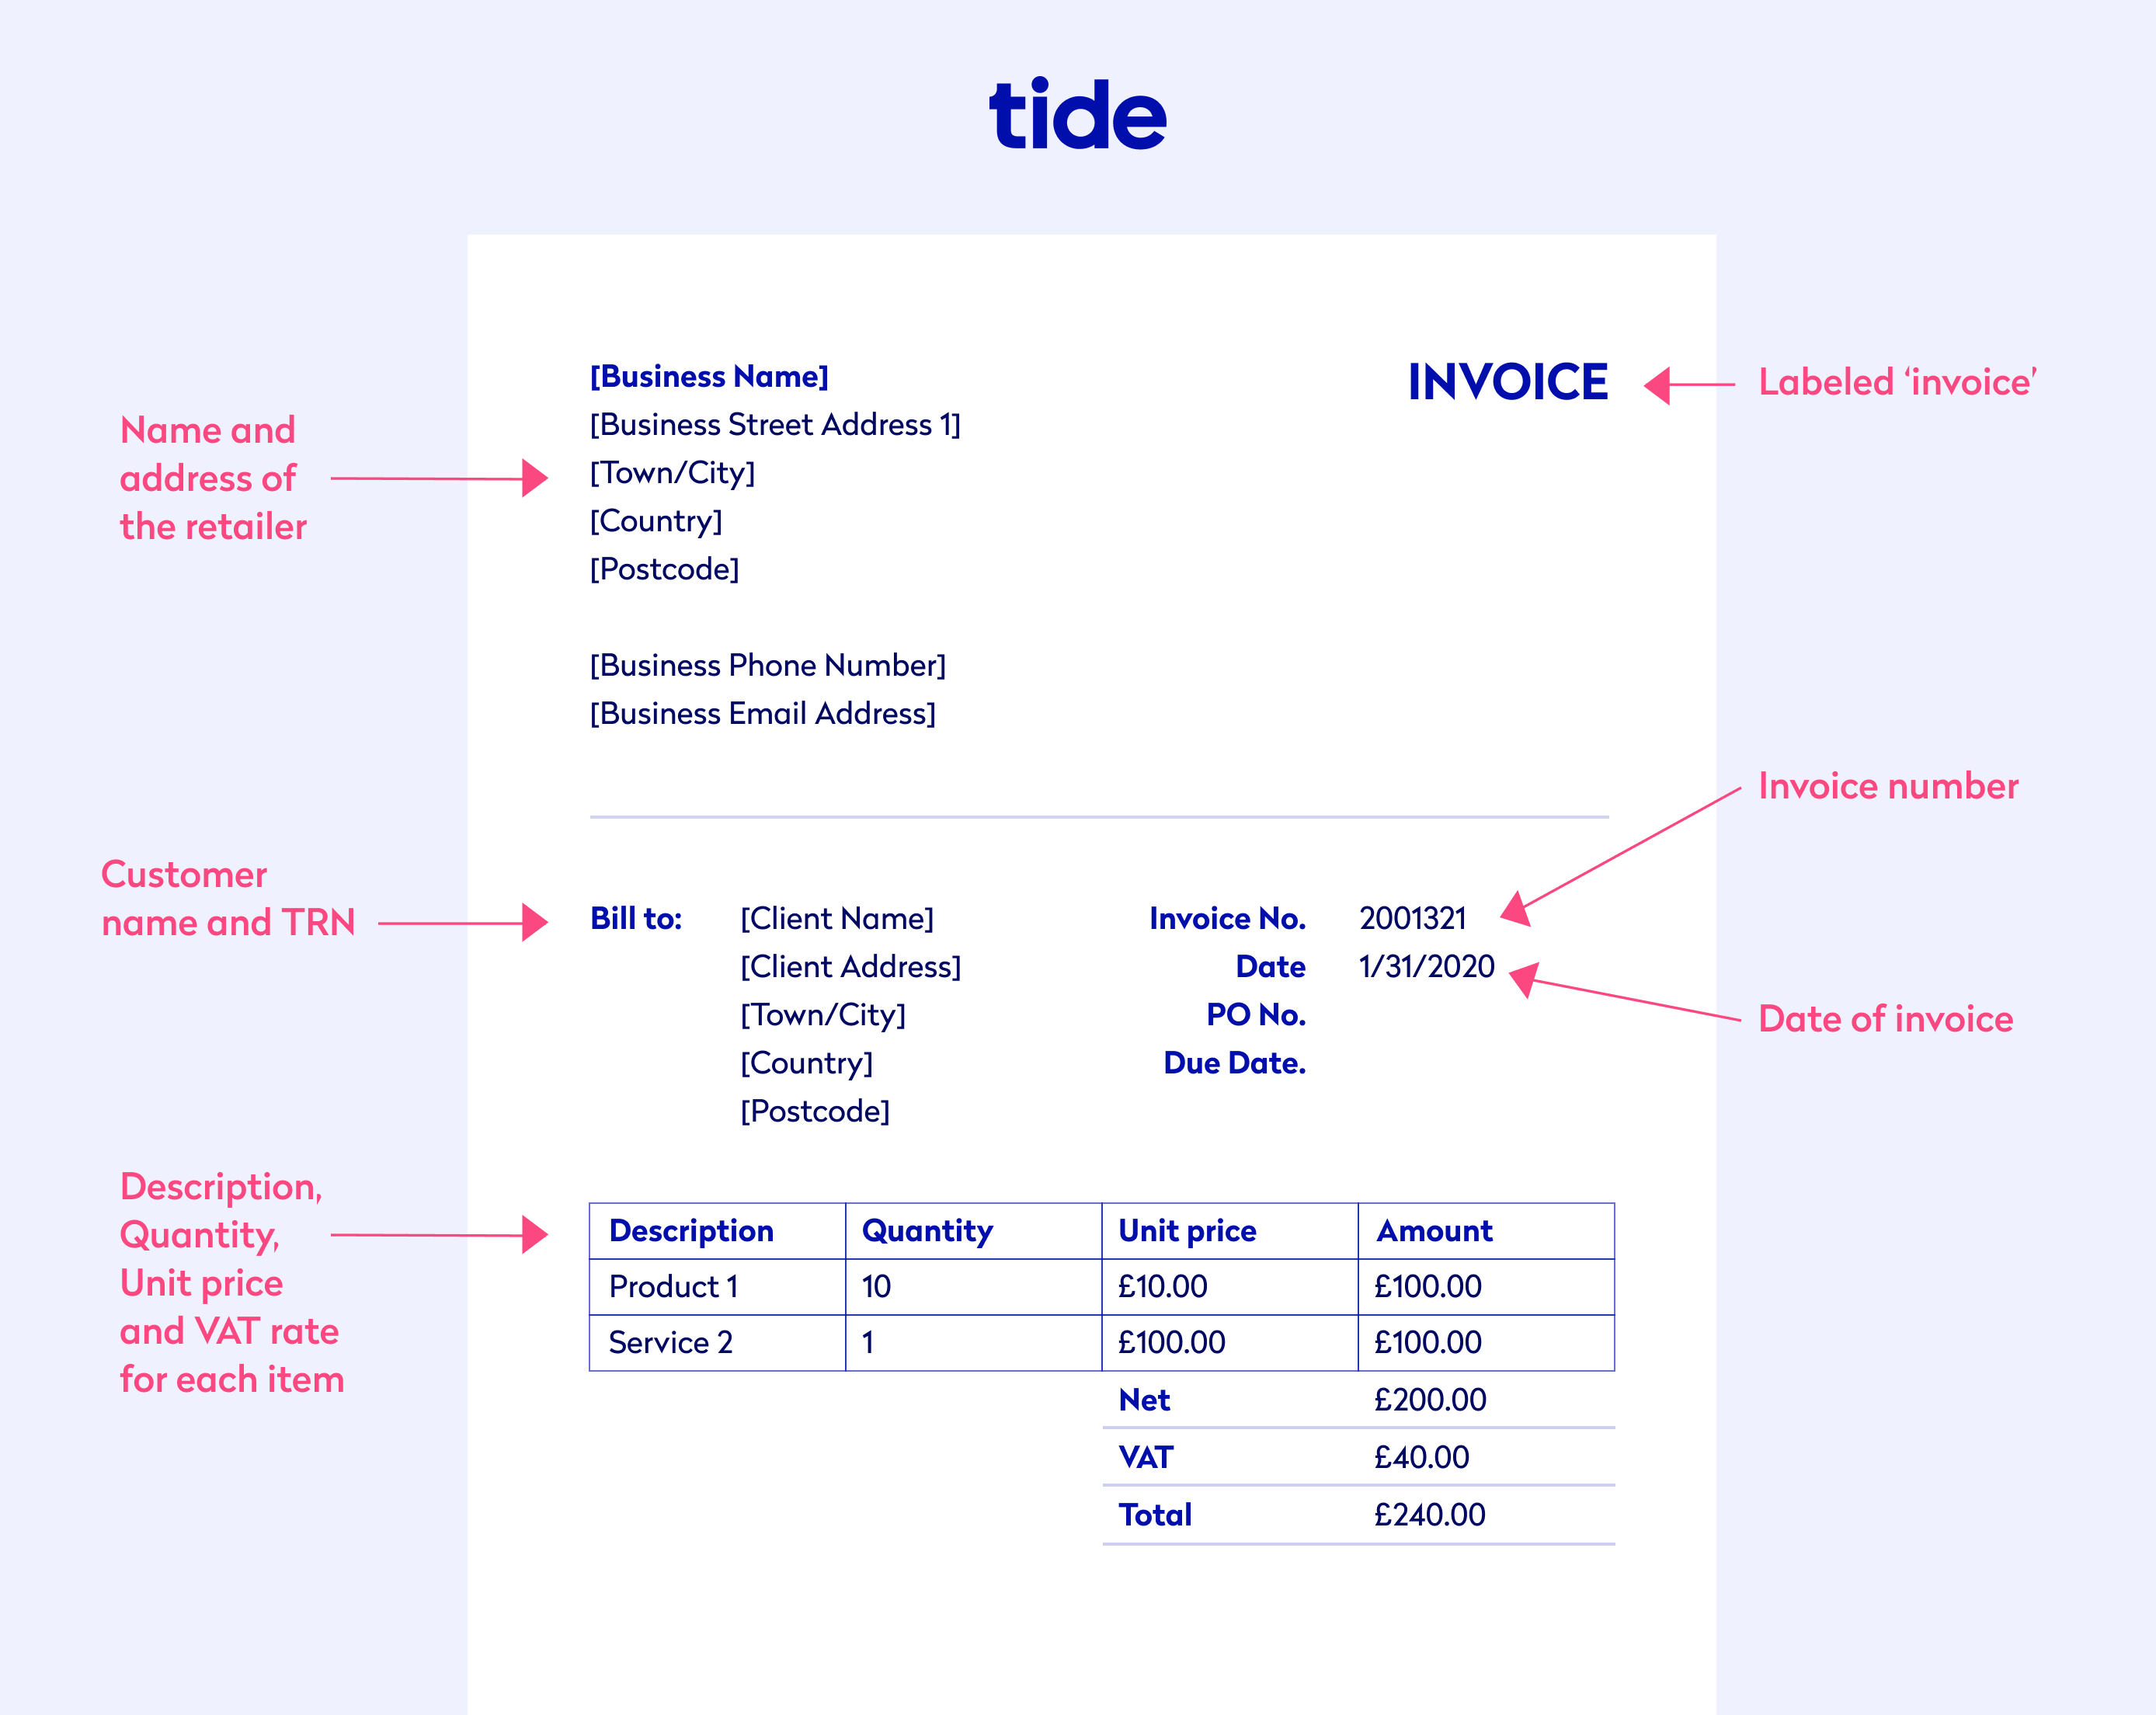
Pay attention to the size and placement of your invoice ID. The best practice is to place your invoice ID at the top right or left corner of your invoice, where it’s prominent and hard to miss.
You can see the invoice number placement in our example invoice below:
Step 4: List the delivered products or services
The next part is to create an itemised list of the products and services for which you are invoicing.
In this section, you should be as thorough as possible without overwhelming the document with text. It’s a balancing act to include the right information in a concise and readable way. Creating a table, for example, is an excellent way to organise the delivered items.
This item table could include the following information:
- Serial numbers
- Names of the items delivered
- The quantity of items delivered
- A short description of each item
- The cost of each item in the list
- The hourly or day rate
Try to keep your itemised list simple and straightforward. You don’t want to add too many columns or text, which may confuse your client and cause issues with timely payment.
Top Tip: Invoices are an important record of your business’s transactions, a critical component of your small business bookkeeping. Learn more about how to keep your finances organised in our guide to small business accounting 💷
Step 5: Specify the total amount due
Once you’ve added the list of delivered items to your invoice, the next step is to state the total amount that’s due from your client.
This step may be as easy as adding up the costs of each item and noting the total amount due at the bottom. But sometimes, invoices involve discounts and prepayments, so you need to make those adjustments to the total amount owed.
The best way to do this is to display a net total (or subtotal) and then a final total.
For example, adding up all the individual costs may come out to be £4,500 (net total). But since you’ve agreed to offer a 7% discount to your client, the total amount you’ll note in the invoice would be £4,185 (final total after discount).
If you’re applying a discount to the total amount due, make sure you make it clear in your invoice. To do this, add the discount as a line item so that the difference between the net and the final totals is clear.
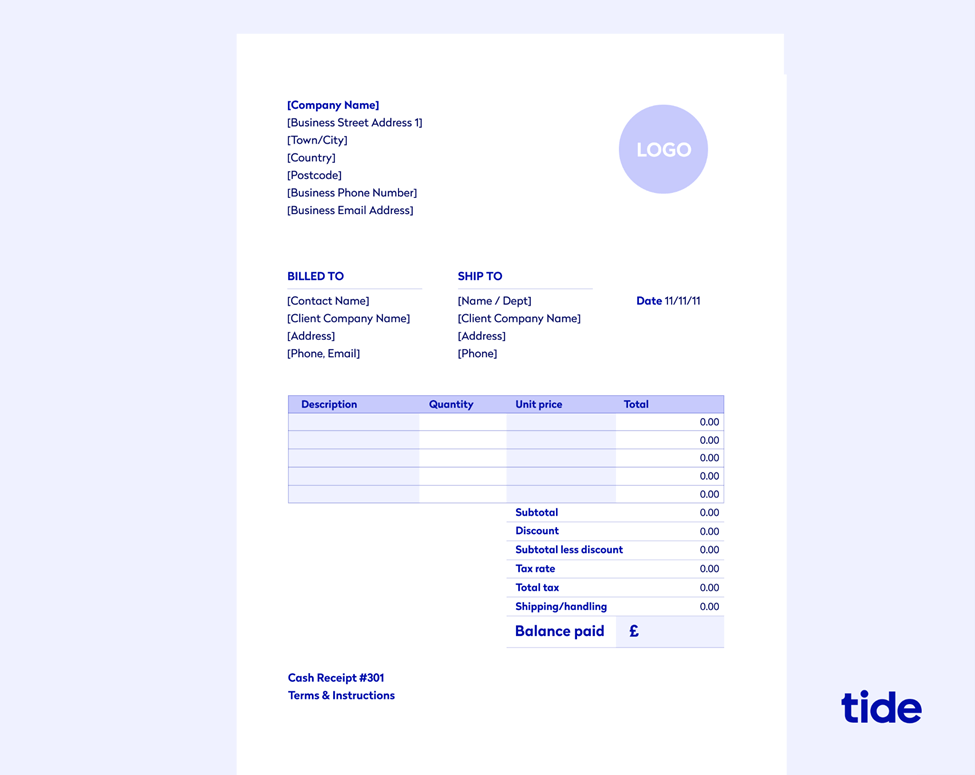
It’s also a best practice to bold or enlarge the total amount due so it’s prominent and easier for both you and your client to find.
You can see this in action on our commercial invoice example:
Step 6: Mention all the dates
Make sure your invoice includes the following dates:
- Invoice date. This is the date you create or send the invoice. It usually goes at the top of your invoice and helps you and your client keep track of when a particular invoice was issued.
- Supply date. This is the date you delivered your products or services. The supply date can be different for each line item, and you can also choose to have a separate column in your itemised list to specify these dates.
- Payment due date. This is the payment deadline. If you haven’t received your payment by the due date, the payment is considered to be late.
Remember to add to your invoice all of the dates mentioned above to avoid any misunderstandings or delayed payments. Including a due date, in particular, gives a clear indication of when you expect to be paid.
Top Tip: Did you know that an invoice is different to a receipt? Explore the nuances of these important business documents in our guide on the difference between an invoice and a receipt 🧾
Step 7: State your payment terms
While payment terms are usually predetermined between businesses and clients, it’s always recommended to mention them again in your invoices.
Payment terms include any information regarding invoice payment, from the available payment options to any applied discounts or penalties.
When it comes to payment methods, it’s a good idea to offer multiple options to make it easier for clients to pay you.
Consider offering some, or all, of the following payment methods:
- Cash
- Bank transfer
- Cheques
- Debit or credit card
- PayPal
Offering online payment methods can increase your chances of getting paid on time, as they provide clients with quick and hassle-free options.
When you select payment methods to offer customers, consider the most logical choice for your business. For example, offering a direct debit option allows repeat clients to pay automatically (and on time). If you send recurring invoices for regular payments, give your customers ease of mind with direct debit.
Each payment method has merits, but not all of them will make sense for your business. If you rely on cash payments, for instance, you’ll need a robust bookkeeping system to stay on top of your cash flow.
Some businesses offer additional discounts on payments made earlier than the due date. This can work as a motivator for clients to pay you as quickly as possible.
Similarly, you can also add penalties or surcharges on overdue payments to prompt clients to pay you on time.
All of the above information should be clearly stated in your agreed payment terms. If you’re offering discounts or adding penalties, you should mention the exact details in your invoice.
Step 8: Add VAT details (if applicable)
According to the UK government, all VAT-registered businesses must issue VAT invoices.
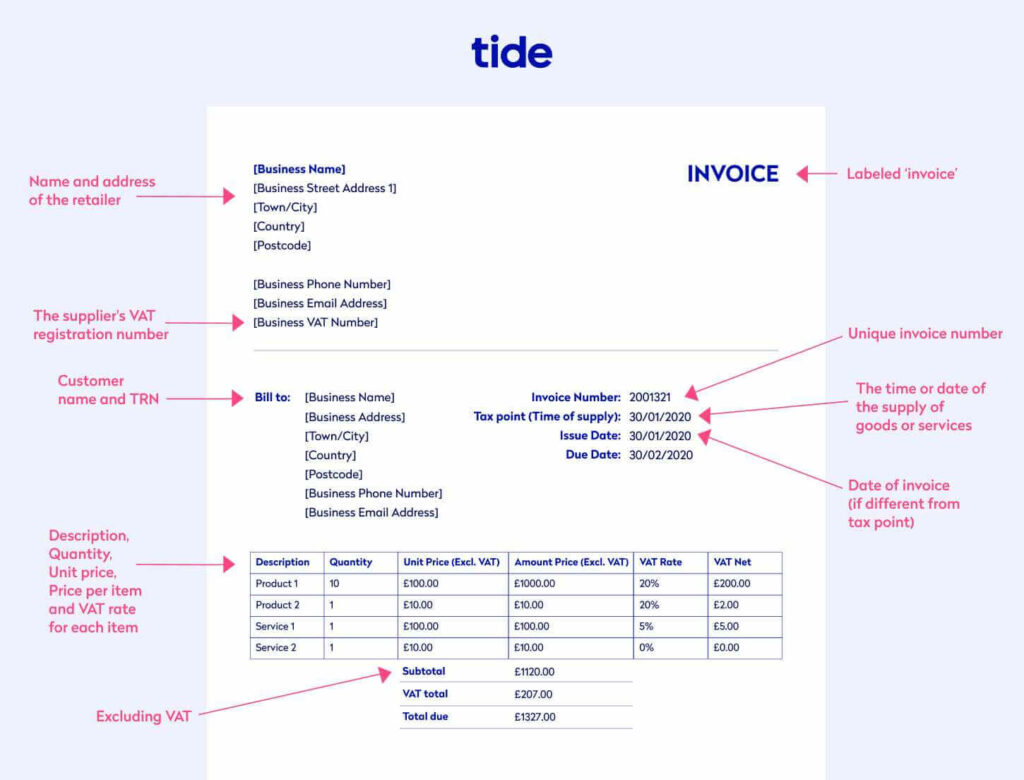
VAT invoices are different from standard invoices in that they require more information, such as:
- The VAT registration number
- The unit price for each product or service
- The rate of VAT charged
- The total amount payable excluding VAT
There are three types of VAT rates you can use: standard, reduced and zero. Make sure you modify your invoice according to the rate you use.
Here is an example of a full VAT invoice:
Top Tip: VAT-registered businesses are required to follow a different process for recording and storing invoices than other businesses. They also need to keep an eye out for requirements related to cash accounting and margin schemes, exemptions and potential penalties. To learn more, read through our guide on VAT invoice requirements 💡
How to get paid on time and what to do if you don’t
Following an effective process for creating an invoice can increase your chances of getting paid on time.
But sometimes, even the most thorough invoices can get ignored or overlooked.
This can happen for various reasons, and most of them are related to what you do after you send out your invoice.
Here are some common tips to help you get paid on time:
- Uphold professionalism across every brand touchpoint. A little professionalism can go a long way. This is true in how you conduct yourself with clients, and also when it comes to your invoices. Each invoice is a reflection of your business, so go the extra mile and create invoices that reflect your brand’s voice and values.
- Draw up a legally binding contract. Before taking on any more work, spend time with a lawyer to create a contract for future work relationships. Clearly define payment terms, including what happens if the client makes a late payment. Safeguard your interests by giving yourself a legal leg to stand on in the case of a payment dispute.
- Be consistent. Sticking to a consistent and predictable invoicing schedule increases your chances of getting paid on time. Plus, it makes your business look more professional, which prompts clients to take your invoices seriously.
- Follow up regularly. After you send out an invoice, make sure you follow up multiple times to remind your client about their due payment. Following up in a professional and non-intrusive way can prevent clients from forgetting about your invoice. Of course, manually following up is a time suck, so consider using an invoice system that automates invoice chasing.
- Develop an effective invoicing process. This may seem like a lot of work, but once you have a proper invoicing process in place that specifies how to create and send invoices, it will be much easier to stick to a schedule, follow up with clients and take appropriate measures in case of non-payment.
- Proofread your invoice. There’s always room for human error, so make sure to proofread your invoices before sending them out to catch any typos, wrong addresses, miscalculations and incorrect dates.
Alternate payment timing
If you’ve been in the position of chasing up invoice payments more than once, you may want to change tact. In many industries, payment comes upon completion of a project. However, it’s down to you to negotiate your own payment terms and timing.
By asking for 50% of the project fee upfront, for instance, you can guarantee that you have money in the bank before you even start work. That way, the client has already committed funds to the project and there’s no risk that you’ll walk away with nothing.
You can even ask for 100% of the payment upfront. To pull this off, you’ll need to lean on your reputation to secure new clients. If you have glowing references and testimonials, then customers are more likely to be comfortable with this option.
Top Tip: Creating a process to create, send and file away invoices can help your business run more smoothly and give you back much-needed time. Learn more in our detailed guide on how to streamline your invoice process 💡
What can I do if a client still hasn’t paid me on time?
Now, let’s say that you did everything right, but a client still hasn’t paid you on time.
In this case, there are two things you can do.
- Cut off future work. If a client fails to make their payment even after you’ve followed up and sent them repeated reminders, you may want to cut off any future work with them. This may sound drastic, but it might be necessary if non-payment has a significant impact on your business.
- Sell your invoice. Another option is to sell your invoice to an invoice financing firm. These firms may be willing to take over the responsibility of chasing down your invoices in return for a fee. This is a good option if your client doesn’t normally delay their payments and if you’re in immediate need of money to maintain a steady cash flow.
Top Tip: Invoice financing is a fast and affordable way to prevent outstanding invoices from affecting your cash flow. Learn more about how to sell your invoices to a lending firm in our complete guide to invoice financing 💰
There are also other, more strict ways to get paid for your invoices, such as adding a late fee, mediation or legal action, but these may cost your business considerably more money than other options.
You need to decide whether it’s worth it to involve a third party or not. To learn more about your options, read our guide on how to chase an overdue invoice (the right way).
Create your professional invoice
A well-crafted invoice can help you stand out from the competition. It gives your business a professional sheen that can enhance your reputation in your clients’ eyes.
Follow the steps outlined in this guide to create a thorough and effective invoice to increase your chances of getting paid fairly and on time.
With Tide, you can create fully customisable invoices on the go in the mobile app. Link your existing business bank account to get access.
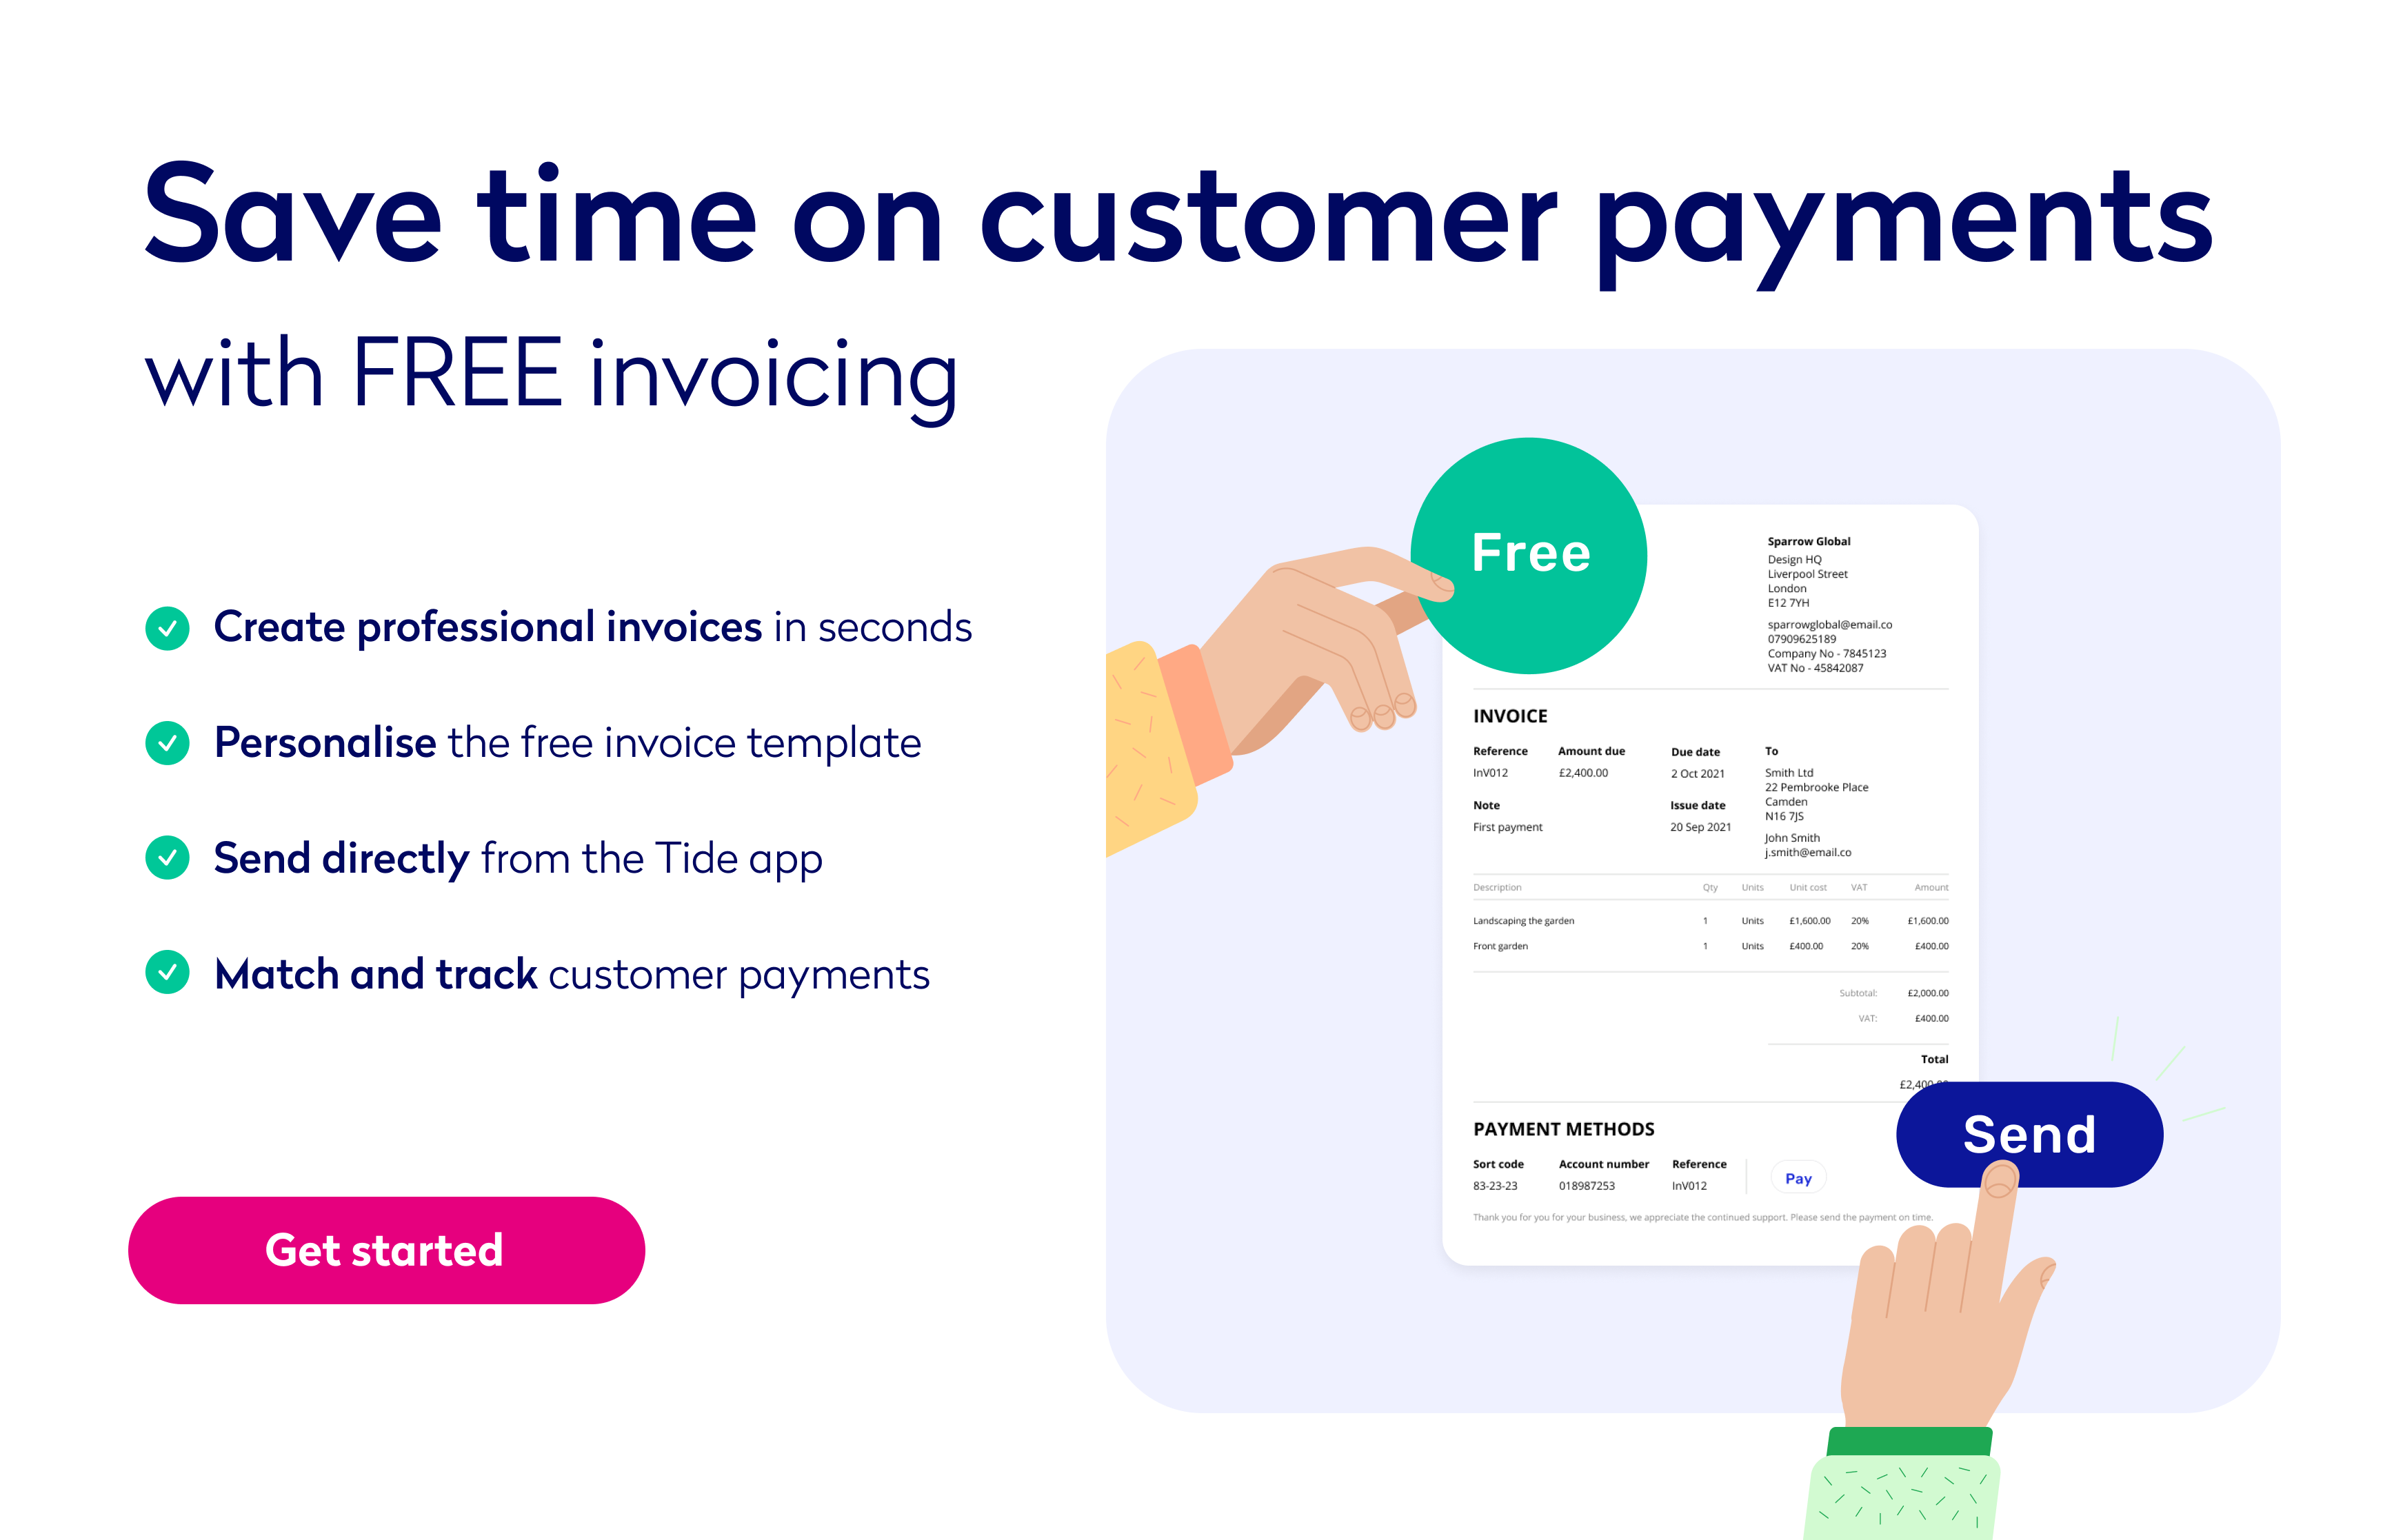
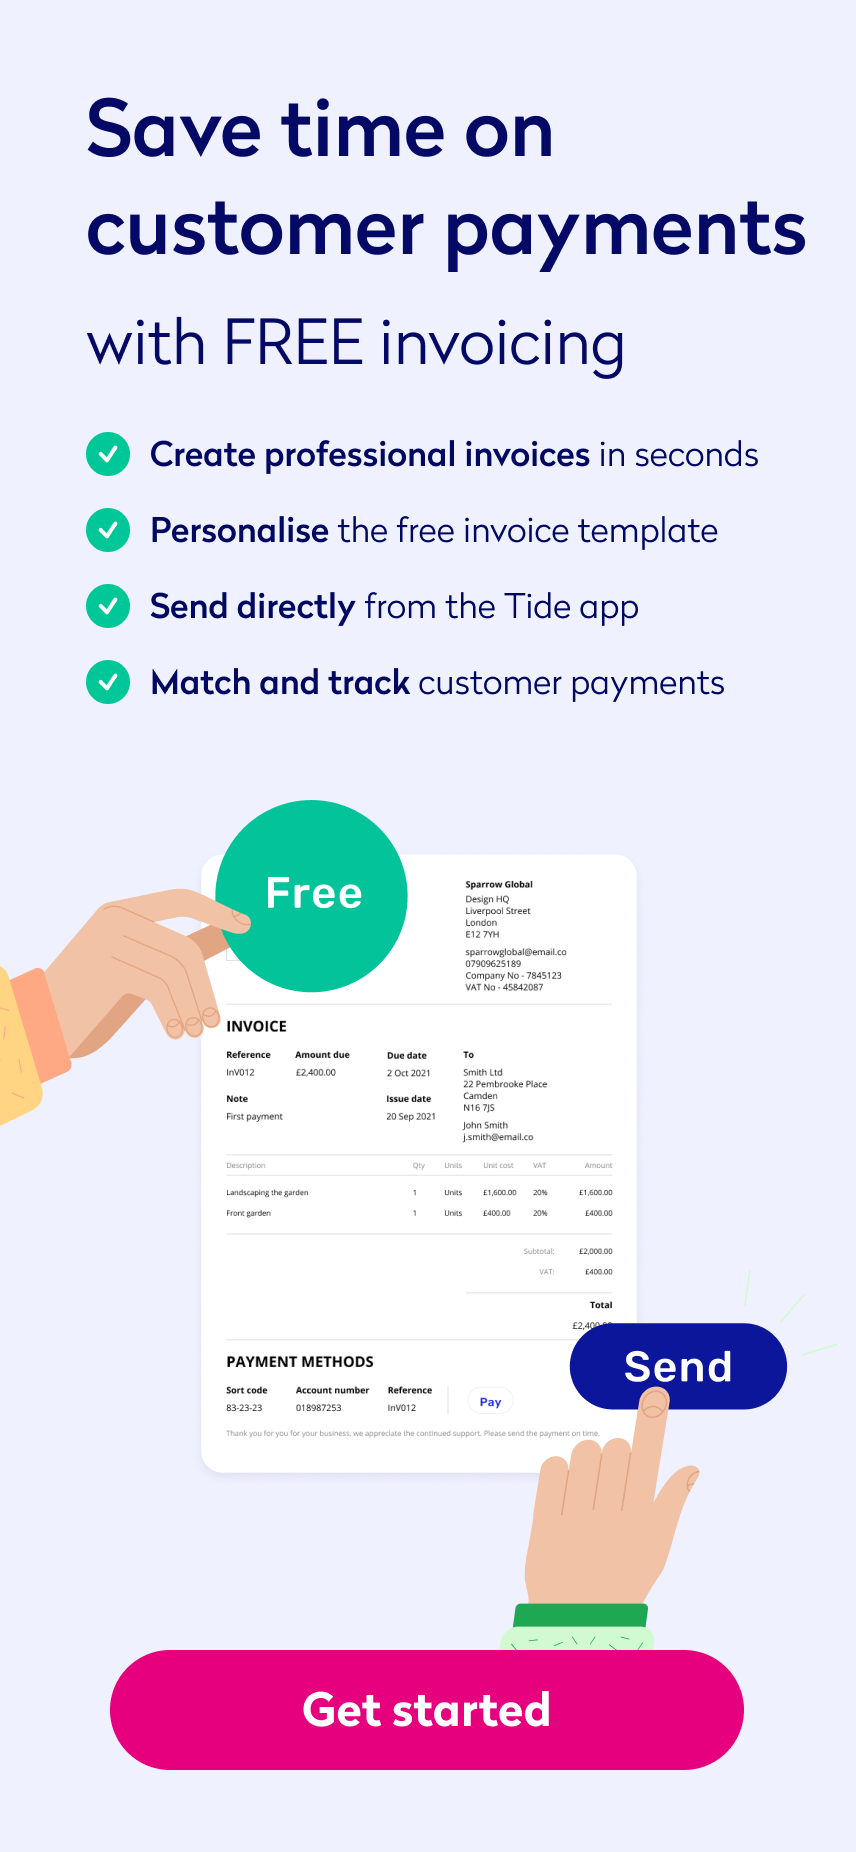
Photo by Karolina Grabowska, published on Pexels


